Category

Repair Tips

DIY Tire Change 101: The Beginner’s Guide Anyone Can Follow

By Jack and Jill of All Tires, Repair Tips, Safety

If you’ve never done it before, learning how to change a tire yourself can feel like a bigger job than it really is. But once you understand the process, it’s much more manageable than you might think. From preparing your vehicle and loosening the lug nuts to swapping the wheel and tightening everything back up, knowing what to expect can make all the difference. This guide walks you through each step, so your first tire change feels familiar before you start.

What You Need Before You Learn How to Change a Tire Yourself

Having everything within arm’s reach makes the job faster and safer. Gather:

  • A floor jack to lift the car
  • Jack stands (a floor jack lifts the car, jack stands hold it)
  • A lug wrench or breaker bar
  • A torque wrench
  • Wheel chocks
  • Your spare or seasonal tire, inflated and ready
  • Work gloves and your owner’s manual
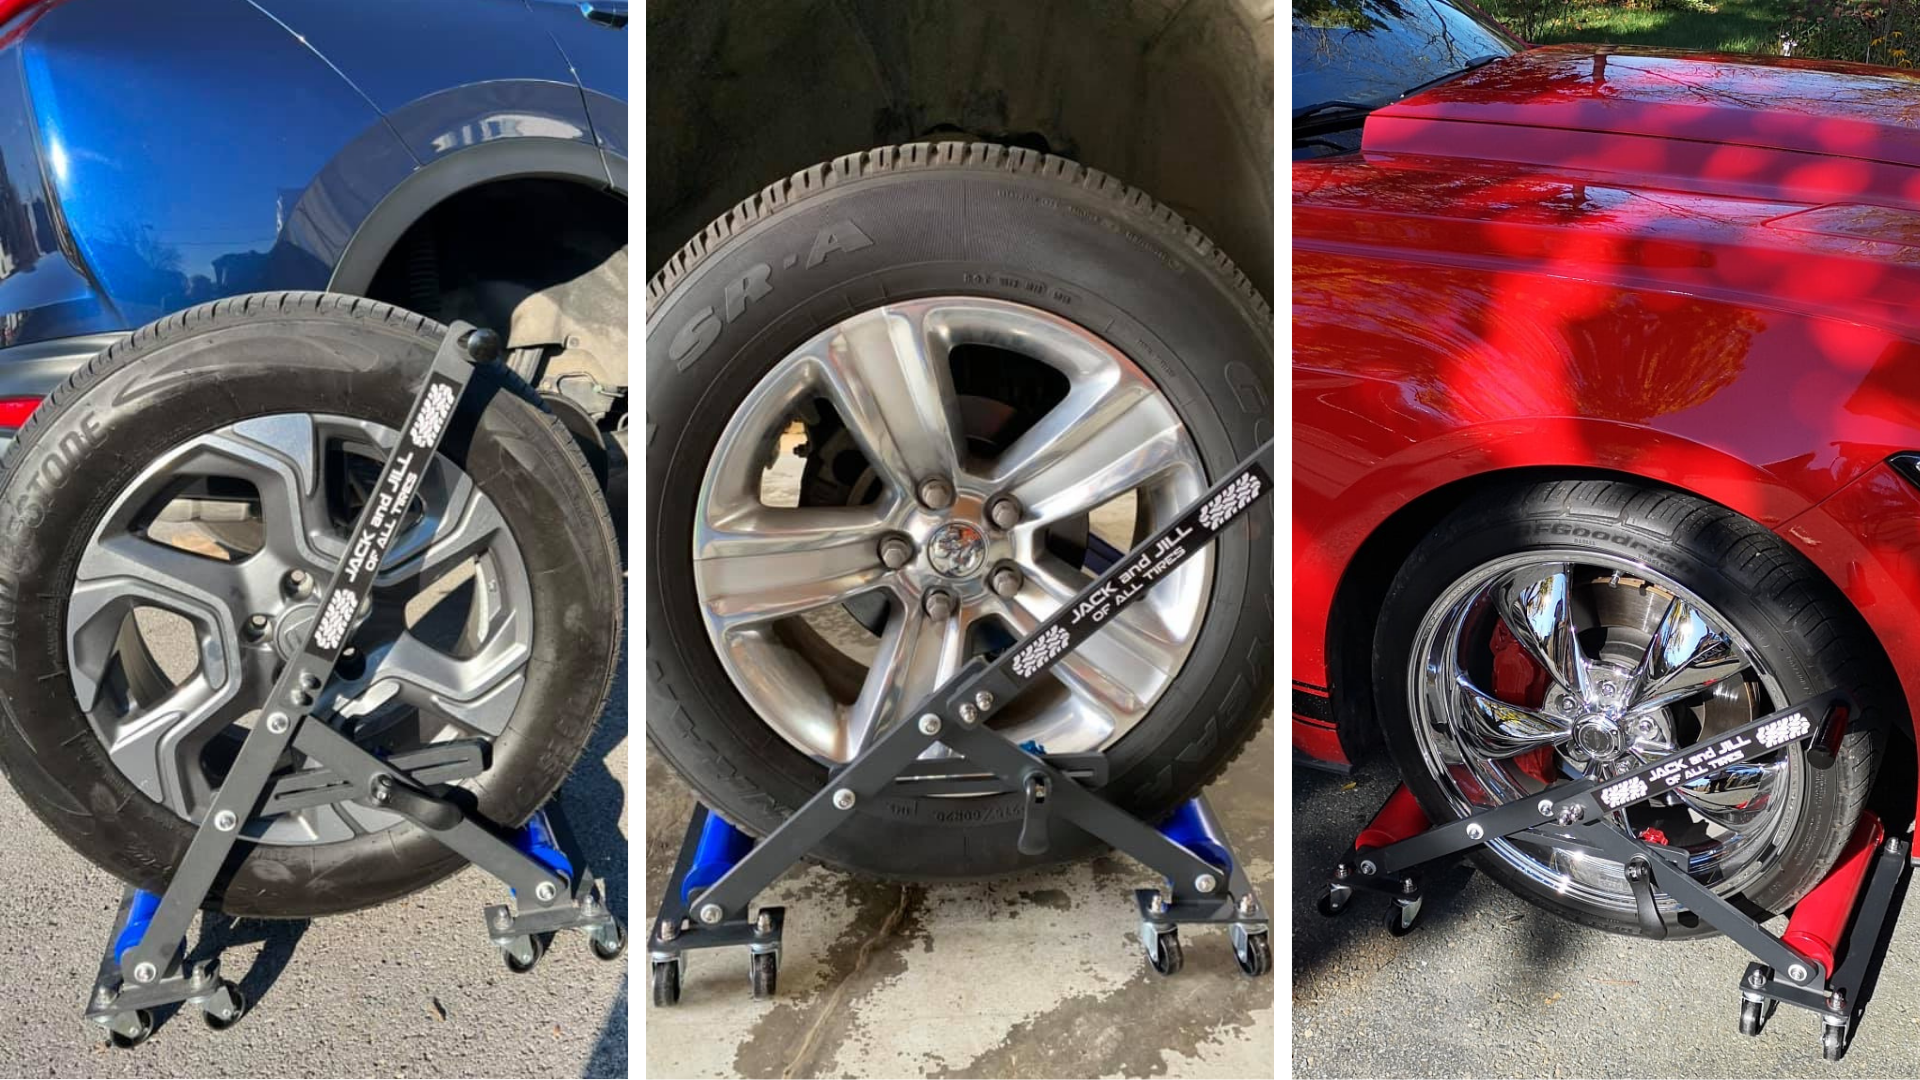
  • The Jack and Jill of All Tires to support and move the tire

Our tools checklist explains what we’d keep on hand and why.

Step 1: Park on Flat, Solid Ground

Flat, solid ground matters more than anything else on this list. A driveway or garage is ideal. Avoid soft ground, gravel, and slopes, since a lifted car can shift on an incline.

Put the car in park (or in gear if it’s a manual), set the parking brake, and place wheel chocks against the tires on the opposite end of the car from the one you’re lifting.

Step 2: Loosen the Lug Nuts First

This is the step beginners most often skip, and it causes the most frustration. If the tire is already in the air, it just spins when you push on the wrench.

With the tire still on the ground, turn each lug nut counterclockwise about a half turn. You’re only breaking them loose, not removing them. If a nut won’t budge, a breaker bar gives you extra leverage.
how to change a tire yourself

Step 3: Lift the Car and Add Jack Stands

Check your owner’s manual for the reinforced lift points on your vehicle. Position the floor jack under the correct point and lift until the tire is clear of the ground.

Once the car is up, set a jack stand under a nearby frame point as backup. Never put any part of your body under a car supported only by a floor jack.

Step 4: Take the Tire Off Without Wrestling It

This is where many first-timers find the job is more physical than they expected. A tire and wheel typically weigh between 40 and 100 lb, which is a lot to manage when you’re kneeling or crouching while trying to keep the wheel balanced. And when you’re swapping all four tires, that physical effort can quickly add up.

With the Jack and Jill of All Tires, changing your tires becomes easier and more manageable by following these simple steps:

  1. Secure the Jack and Jill of All Tires under the wheel before removing the final few lug nuts
  2. Once secure, remove the lug nuts and set them aside.
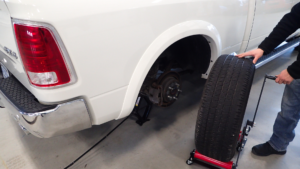
  3. With one hand on the wheel and the other on the handle of the Jack and Jill of All Tires, pull the wheel off the vehicle
how to change a tire yourself

Step 5: Mount the New Tire

Lining the studs up with the holes on the wheel can be one of the more frustrating parts when changing your tires. With the Jack and Jill of All Tires, you’re able to spin the wheel on the rollers to line both the holes and studs up perfectly. Once lined up, simply push the wheel towards the hub and hand thread each lug nut back on.

Step 6: Lower the Car and Torque the Nuts

After threading the lug nuts back on, remove the Jack and Jill from the wheel and lower the car back down. Using a torque wrench, tighten the lug nuts in a star pattern to the vehicles torque specifications located in the owners’ manual.

Mistakes to Avoid on Your First Tire Change

Most first-time tire-changing mistakes come down to a few common oversights:

  • Forgetting to secure the vehicle with the parking brake and wheel chocks
  • Lifting the vehicle before loosening the lug nuts
  • Positioning the floor jack at the wrong lifting point
  • Tightening the lug nuts in a circle instead of a star pattern
  • Guessing at tightness instead of using a torque wrench
  • Forgetting to re-check the lug nut torque after the first 50 to 100 km of driving, as recommended by your vehicle or wheel manufacturer

That last step is particularly easy to overlook. After your first short drive, check the lug nut torque again according to the manufacturer’s recommendations. It’s also a good idea to double-check your tire pressure before hitting the road.

How to Change a Tire Yourself, With Less Heavy Lifting

The steps above don’t change from car to car. Lifting the car is easy with a floor jack. Handling the tire is the part people dread, and it’s what the Jack and Jill of All Tires was built for. It works alongside your jack, supporting the tire’s weight while you guide it off and back on.

Timing your swap? Our post on why 7°C is the magic number explains when winter tires make sense. You can also see the Jack and Jill of All Tires in the shop, watch it in action on the videos page, or read our complete step-by-step guide and FAQ for more detail.

Car Wash Tips: 5 Simple Steps for a Perfect Wash (And Why It Matters More in Winter)

By Car Cleaning, Repair Tips


A good wash does more than make your car look sharp. These car wash tips cover the small habits that actually protect your paint and your undercarriage, especially once winter driving is involved.

Our Top Car Wash Tips for Protecting Your Paint

1. Rinse from the top down. Dirt and grime settle lower on the car, so working top to bottom keeps you from dragging grit across paint you’ve already cleaned.

2. Don’t skip the undercarriage. This one matters most in winter. Road salt collects on the undercarriage and wheel wells, and left alone, it speeds up rust. A rinse focused underneath the car is one of the most protective things you can do between November and March.

3. Use a proper wash mitt, not a sponge. Sponges tend to hold grit against the surface as you wash. A microfiber mitt is gentler and far less likely to leave swirl marks over time.

4. Dry it properly. Air drying leaves water spots, especially with hard water. A microfiber towel or a quick chamois pass keeps the finish looking clean.

5. Wax a couple of times a year. A coat of wax adds a layer of protection between your paint and everything the road throws at it, especially salt and slush in winter.

car wash tips, rinsing undercarriage after winter driving

Why these car wash tips matter more in winter

Road salt is effective at melting ice, but it’s hard on a car’s undercarriage, wheel wells, and paint over time. A wash every couple of weeks through the winter months, undercarriage included, is one of the simplest habits you can build to protect your investment.

Keeping your car clean is one piece of winter-ready maintenance, but it’s not the only one. Checking your tires before the season changes matters just as much, and making that swap doesn’t have to be a hassle either. If you’re due for a seasonal tire change, the Jack and Jill trolley takes the heaviest, most awkward part of the job off your hands, so a quick wash and a tire swap can both get done in the same weekend without either one being a chore.


A good wash does more than make your car look sharp. These car wash tips cover the small habits that actually protect your paint and your undercarriage, especially once winter driving is involved.

Our Top Car Wash Tips for Protecting Your Paint

1. Rinse from the top down. Dirt and grime settle lower on the car, so working top to bottom keeps you from dragging grit across paint you’ve already cleaned.

2. Don’t skip the undercarriage. This one matters most in winter. Road salt collects on the undercarriage and wheel wells, and left alone, it speeds up rust. A rinse focused underneath the car is one of the most protective things you can do between November and March.

3. Use a proper wash mitt, not a sponge. Sponges tend to hold grit against the surface as you wash. A microfiber mitt is gentler and far less likely to leave swirl marks over time.

4. Dry it properly. Air drying leaves water spots, especially with hard water. A microfiber towel or a quick chamois pass keeps the finish looking clean.

5. Wax a couple of times a year. A coat of wax adds a layer of protection between your paint and everything the road throws at it, especially salt and slush in winter.

car wash tips, rinsing undercarriage after winter driving

Why these car wash tips matter more in winter

Road salt is effective at melting ice, but it’s hard on a car’s undercarriage, wheel wells, and paint over time. A wash every couple of weeks through the winter months, undercarriage included, is one of the simplest habits you can build to protect your investment.

Keeping your car clean is one piece of winter-ready maintenance, but it’s not the only one. Checking your tires before the season changes matters just as much, and making that swap doesn’t have to be a hassle either. If you’re due for a seasonal tire change, the Jack and Jill trolley takes the heaviest, most awkward part of the job off your hands, so a quick wash and a tire swap can both get done in the same weekend without either one being a chore.


person wearing flip flops with their feet in the snow

Why You Should Change Your Winter Tires

By Jack and Jill of All Tires, Repair Tips, Tires

Why You Should Change Your Winter Tires


The rubber and tread on winter tires are specially designed to be more flexible; making it easier to withstand cold temperatures as well as driving on ice and snow.

When the temperature starts to rise, the flexible rubber that adds traction in the winter will wear down significantly faster compared to all seasons or summer tires.

In addition to wear and tear, driving on warm, dry pavement with winter tires can decrease the drivers’ handling capabilities. Sharp turns aren’t so sharp, and you may notice a bit more noise while you drive.

Important Safety Tips

  • Driving on winter tires in summer increases the braking distance by at least 10% on dry pavement and 26% on wet pavement.
  • Going 70 km/h on wet pavement increases the braking distance by up to 42%.
  • Going 90 km/h on dry pavement increases the braking distance by up to 19.3%.

Winter Tires

When You Should Change Your Winter Tires


Even though the snow and ice may be gone, you should really be changing your tires based on the temperature rather than the winter elements.

The guidelines may vary between tire brands but, on average, the best time to change from winter to summer tires is when the temperature is consistently around 8°C (46°F).

To put this into perspective, treat your tires as footwear. You swap flip-flops for boots in the winter, so you should also swap your tires when the weather changes.


Visit our website for more information on how to change your tires at home!

Cars in a snow storm

Get Ready for the Snow and Ice

By News, Repair Tips, Safety

Before you venture out into the snow and ice this winter, be sure that you have winter tires to increase your safety on the road.

Purchase the Jack and Jill of All Tires to help you change your winter tires today!


Even though driving may feel like second nature, when the weather changes the road conditions, we must be extra cautious to ensure the safety of ourselves and others.


Here are some tips to help navigate through the snow and ice:


Drive Slowly

Slow and steady really wins the race! When there’s lots of snow and ice on the ground, driving in slower speeds will help your tires gain more traction and control while on the road.

Keep Your Distance

The more space you keep between you and the vehicle in front, the more time you have to stop or react to sudden action on the road.

Keep Moving

Don’t stop on snow or ice if you can avoid it. It’s difficult to regain inertia when your tires have stopped moving, so we suggest keeping a steady pace when making a turn or approaching a light (U.S. News & World Report).

How to prevent problems on the road


While driving cautiously can help you be safe on the road, there are other ways you can ensure safety throughout your vehicle and travels:


1. Plan your trip and check for weather and road conditions.

Check weather updates from your local news station OR use a weather app on your phone to get the latest conditions of where you are and where you’re going.

2. If you’re in an area that receives snow, consider winter tires.

Check out our previous blog post to learn about this seasons’ weather predictions across Canada and U.S.

3. Carry extra windshield fluid.

Winter aka ‘washer fluid season’ calls for lots of dirt, salt and debris on the road that will impact your visibility while driving. It’s always important to be topped up, but especially during the winter months. Keeping extra washer fluid in your car is a great way to stay safe on the road.

4. Pack an emergency kit.

You can’t plan for an accident – so it’s important to be prepared for when one happens. Keeping a compact emergency kit in your vehicle will get you through the more common dead batteries to more serious roadside incidences. The Get Jacked Safety Kit comes with the tools you need to get yourself out of trouble and items to keep you comfortable until help arrives.


snow and ice


“Prevention is better than recovery.” 


Be sure to check your battery, ignition system, lights, brakes, tire pressure, windshield wipers, heating and cooling systems!


Safe travels this winter.


Person wearing gloves using an ice scraper on a car windsheild

5 Game-Changing Winter Driving Accessories

By Accessories, Repair Tips, Safety, Tires

Aside from the obvious jumper cables, first aid kit, washer fluid, snow brush and ice scraper, there are a few more essentials that every motorist should have in their car during winter.

Here are Jack and Jill’s top 5 winter accessories from Amazon:


1. Windshield Snow Cover

Not only does this cover keep the snow off your windshield, it also saves you from scraping the frost and ice. This accessory will ultimately save you time in the morning for an easier and faster getaway!

2. De-Icer

So your windshield is winter-proofed but your door is iced shut…now what?

A can of de-icer can go a long way. Without damaging your cars’ paint, a quick spray will have the frost and ice instantly melted, giving your arms a well deserved break from scraping.


Now that you’ve made your way into your car, there’s a few more accessories to keep you warm and safe.


3. Regular or Electrical Blanket

Electrical or not, a blanket is a great piece to have on hand for any drive.

4. Unscented Candle

There’s nothing worse than your car suddenly shutting down on the side of the road while it’s below zero. Lighting a large unscented candle will warm up your vehicles’ cabin area long enough to keep you comfortable until help arrives.

You’re stuck, now what?


5. Cat Litter

Not an obvious winter accessory but when you’re stuck in snow or on ice, sprinkle some under your tires. Cat litter will help you gain traction so you can get back on the road.


Consider using these accessories to keep yourself prepared and safe this winter!


Person wiping the side of black car

Protect Your Vehicle from Road Salt this Winter

By Car Cleaning, News, Repair Tips, Safety

Although we may love the idea of a beautiful White Christmas, your car sure doesn’t. If you’re driving on the road often, your vehicle may pick up lots of dirt, salt, rocks and other debris hidden in the snow.


Here are 3 ways to keep the exterior and interior of your car clean this winter:


1. Paint Protector

Winter weather conditions take a toll on the exterior of your car. Just like when you wear gloves, a hat, and coats to endure the snow and cold, your car also deserves some added protection.

Your vehicle’s paint protects the metal from outside elements like ice, salt and debris. Using paint protector will keep the paint in shape and ensure your vehicle is not exposed to corrosive properties (washmenow.ca).

Now is the perfect time to add a layer of protection to your car before the snow and salt start hitting the road. You can either purchase a paint protector and apply it yourself or take your car to a detail shop.

Salt

3. A Car Wash Goes a Long Way

One element of winter driving that causes the most exterior damage to your vehicle is road salt. Salt on the road does have benefits for safer driving, however it can cause some damage to your exterior over time.

In-N-Out-Car-Wash explains that “Salt can get into all the cracks and crevasses of your car, waiting for the spring when the weather warms up and it actively starts to produce rust and corrosion.”

Washing your car throughout the winter season is a great way to keep the bottom and sides of your car clean and prevent rust or deterioration.

There are a few options to choose from when washing your car this winter:

  1. A single wash at your local gas station, estimated between $7.99-$14.99 CAD depending on the service
  2. Specialty car wash shops such as In-N-Out-Car-Wash
  3. Season passes offered at local gas stations


Salt

3. Don’t Forget to Look Down

Salt, snow, mud and dirt not only make a mess of your exterior but also collect inside. When getting into a vehicle, most of us are focused on getting away from the cold that we don’t pay attention to the mess we bring in.

If you haven’t done so already, look into purchasing rubber floor mats for your car. Even though most cars have a rubber base, a mat will make cleaning out dirt and salt much easier and allow you to keep it clean more often.

Tip: To clean the mats themselves, use a rim and tire cleaner to get rid of the stains the salt leaves behind.

Salt


Subscribe to our newsletter for more road safety in your inbox!

5 Driving Habits You Should Break

By Repair Tips, Safety

For most people driving has become second nature. Doing an activity so seamlessly every day can cause us to pick up some bad habits that could potentially put us in danger on the road!


1. Using your cellphone

We know by now that texting or talking on the phone is the most dangerous habit to have while driving. Our attention is focused on our device and not on the road, and is a major cause of distraction and accidents. Different provinces and states have their own legal ways of controlling the use of devices while driving.

For the safety of yourself and others on the road, be sure to put your phone away or pull over to send a text or take an important phone call.

2. Eating while driving

With all of these quick drive-thru options, it’s hard to resist grabbing your morning coffee with a quick breakfast, or getting an easy lunch on the go. However, eating while driving is a habit that is just as dangerous as being on the phone.

Your mind is attempting to focus on the road while also eating, drinking and trying not to make a mess. It’s best as the driver to finish your food before heading back on the road or wait until you reach your destination. 


bad habits: eating while driving

3. Entertaining your passengers

Your vehicle is an easy place to socialise with your family or friends. Whether it’s engaging in conversation, playing a movie for those in the back or trying to talk with everyone; it can all be too distracting.

Again your mind is focusing on the people, the conversations and the other things around you. Your attention may draw towards what’s happening inside the car rather than outside of it.

As a driver, you hold a responsibility to keep your passengers safe, so attempting to entertain them while also focusing on the road is a bad habit. 

4. Pets

Who wouldn’t want their best friend riding shot-gun? Having your pet beside you may seem like a good idea, however trying to drive while also taking care of your pet that needs attention is dangerous for not only you but the dog as well.  A dog on your lap limits your ability to manoeuvre the car, especially during a collision. Even in the passenger’s seat, your dog could be severely injured by an airbag. 


Results from a AAA NEWSROOM SURVEY included this statistic:

An unrestrained 10-pound dog in a crash at only 30 mph (48 Kph) will exert roughly 300 pounds of pressure, while an unrestrained 80-pound dog in a crash at only 30 mph will exert approximately 2,400 pounds of pressure.


The safest place to keep your dog is in the backseat secured by a seatbelt seatbelt or in a crate!


5. Loud music 

Of course we all love to belt out to our favourite tunes! And if you don’t turn into a professional karaoke singer when you drive, are you even driving? But this little habit can have you singing and dancing in your seat and cause you to lose focus on the road.

We aren’t saying to never play your music, but make sure to keep the volume at a level where you can pay attention to the road and your surroundings; more importantly so you can hear other drivers and first responders. 

Bad Habits

Make your drive safer for you and your passengers by breaking these 5 habits!


Want to learn more about safety tips on the road? Check out our other blog posts here for more information about tire safety and travel tips!


Travel Tips for Back to School

By News, Repair Tips

When getting ready to drive on the highway, it’s important to be prepared for the long journey. Flat tires happen often on these types of trips and there are simple ways to prevent or limit this hazard.


What Can Cause a Flat Tire:

Tire Pressure

  • Over or under-inflated tires can cause lots of damage to your vehicle. So, before heading on the road it’s very important to check your tire pressure. The recommended PSI for your vehicle’s tires is located on the panel on the inside of the driver’s side door.

However, a common mistake that is often overlooked is the effect that extra weight has on your tires.

  • When you are moving back to school, be cautious when overloading your vehicle with excess weight your tires are not used to carrying. If too much weight is sitting on a tire, it can cause a blowout (same effect as sitting on a balloon). So be sure to compensate for the extra weight and distribute an even pressure amongst all four tires.

Poor Road Maintenance/Construction Zones

  • Flat tires and highway construction zones go hand in hand. Many major highways have areas that are under construction for either maintenance, extensions or upgrades.
  • When driving through these areas, be sure to slow down and look ahead for signs of construction debris such as nails and glass and also try to avoid unmaintained pot holes or rough paving spots. It is important to note that “if the hit is hard enough, it can damage the tire, either on the outside where one can see it or on the inside where the damage is hidden” (Wheels.ca). Concluding that the damage could be instant or the wear and tear on your tires could result over a few months.

It’s a Blowout! Common Causes of Flat Tires

Hot Weather

High temperatures cause the air in your tires to expand, increasing the tire’s overall internal pressure and the chances that you’ll spring a leak or blowout altogether. During warm weather, be sure to monitor your tire pressure regularly and do what you can to avoid overinflation.

How to prepare for your trip

  • Plan your route and consider alternative ways in case of road closures
  • Follow your local news outlets for updates on highway traffic and accidents
  • Check your vehicle and tires before and during your trip

How we can help


We carry two products that were created for the safety of our daughters who also endured these long road trips to and from school throughout the years. Click the link to check out Our Story.

The Jack and Jill of All Tires

Essential for long drives, The Jack and Jill of All Tires is a simple and compact tool that can be stored in the trunk of your car – making changing your tires on the road safe and easy!

Our website also includes a detailed step-by-step process so you can learn to change your tires wherever you are.

Get Jacked Safety Tool Kit

Our Get Jacked safety kit is a must have no matter your destination, so you’ll always prepared in case of an emergency.

Safety Kit includes:
Bag
Compact Snow Shovel
Candles & Matches
Hand Warmers
Emergency Blanket
‘Call Police’ Banner
Flashlight – Batteries
Booster Cables
Emergency Tow Rope
Whistle

Contents of safety kit


It’s important to be aware of how to maintain your tires and prevent damage as much as possible.


Safe travels!

Why you need winter tires when you’re driving to Florida

By Repair Tips

Should you drive to Florida with winter tires, then drive around in warm weather on softer rubber, or drive south with all-season tires to suit the warmer climate?

Winter tires are the way to go. No matter how new and innovative your car model is, none of those modern electronics can create traction. They can only maximize whatever traction you have, and all traction is done by the tires. When it comes to those four small patches of rubber holding the car on the road safely, you should make sure you’ve got winter tires on your car when it’s still cold and snowy at your departing location.

The softer rubber and specially-designed treads on winter tires give them better grip and performance on slippery surfaces, and better traction to maneuver and brake at shorter distances. You don’t want to drive over ice without them, trust us.

Tip: Major tire manufacturers recommend that you switch to winter tires once your local temperature is consistently at or less than 7 degrees Celsius or 45 degrees Fahrenheit.

Why winter tires can still work in the heat (but all-seasons don’t in the cold)

Today’s winter tires are designed to stay flexible when the temperature drops below the freezing mark, but they are also more resistant to wear at higher temperatures than the old “snow” tire of days past. Tires wear very little on the open road – the turnpikes you’ll use heading south. Other than aggressive driving in corners at higher speeds, most tire wear occurs when turning at slow speeds in suburban areas and during parking manoeuvres and when drivers use the power steering to turn the wheels when the tire is standing still, literally scrubbing off rubber.

Most consumers have been oversold about how quickly winter tires will wear when run on hot pavement. Yes, winter tires do wear faster in the heat than all-season tires, but they do not melt off the car. You can help the treads last longer by showing the tire some respect and don’t let them run too hot by braking or accelerating quickly. Extra heat is also caused by under-inflation, so be sure to check your tire pressure regularly.

Are winter tires necessary for an extended stay in Florida?

You’re still making the trip down in wintery conditions. It would be rare for a driver to make it all the way down the interstate to Florida without some form of cold precipitation, whether it be freezing rain or snow. It’s not worth risking the safety of yourself and those along for the ride. Winter tires are a must for the trip down and back.

So, can you drive on winter tires year round? It’s an idea that occurs to many drivers who experience winter weather: “If I have to mount snow tires every year, why don’t I just keep them on my vehicle all the time?” In Quebec where snow tires are mandatory in winter, some people leave them on their car year-round because it’s not required to remove them. If those people knew how to change their own tires, they could easily switch back to all-seasons and wouldn’t have to replace those winter tires as often!

Why not use winter tires all the time?

The softer tread of a winter tire will wear out faster in warmer temperatures. If you keep winter tires on your vehicle after winter has come and gone, you will have to replace them sooner than if you removed them for springtime. However, driving on winter tires in Florida for a number of weeks is still fine when you’re there for shorter period of time than an entire summer. We don’t advise using winter tires year-round. The specialized compounds and tread designs of winter tires are not designed to perform in warm climates.

If it’s the hassle of tire changing that you’re dreading, we have a suggestion for simplifying that process: change them yourself. With the right tools and know-how, it’s absolutely safe to change passenger vehicle tires on your own. Learn how to change a tire with our step-by-step illustrated guide.

Keep your loved ones safe on your journey

You may not think of tires as a safety feature, but they’re one of the most important aspects of driving that help you stay out of harm’s way – even more than experience behind the wheel. If you care about the safety of yourself, your family, and other people on the road, you should make sure you’ve got the right tires on your car. So go ahead and equip your car with a good set of winter tires – store your all-seasons at home and enjoy your vacation.

Is It Safe to Change Your Own Tires? Common Questions Answered

By Repair Tips

If you’re wondering is it safe to change your own tires, you’re not alone, it’s one of the questions we hear most. The short answer is yes, as long as you understand what actually makes it hard, and what doesn’t. Here’s everything people ask us, answered honestly.

Do I need to be strong to change my own tire?

Not really. The hardest part of a tire change isn’t strength, it’s stability: lifting a 40 to 100 lb tire and holding it steady while you line it up with the bolts. That’s the part the Jack and Jill trolley handles for you.

What tools do I actually need?

A floor jack to lift the car, a lug wrench, your spare or seasonal tire, and something to help you manage the tire itself once the car is up. Our tools checklist breaks down everything we’d recommend keeping in your trunk.

Where’s a safe place to actually do this?

Flat, level, solid ground, away from traffic. A driveway or a paved shoulder well off the road is ideal. Avoid soft ground, an incline, or anywhere a jacked-up car could shift.

Is it hard on my back?

It can be, if you’re crouching and lifting the tire by hand. Using a trolley to support the tire’s weight removes most of that strain, which is one of the reasons the product exists in the first place. Read more about why it was built that way.

What if I don’t torque the lug nuts correctly?

Under-tightened lug nuts can work loose over time, and over-tightened ones can warp the brake rotor or make the nuts harder to remove later. A torque wrench set to your vehicle’s specification (check your owner’s manual) takes the guesswork out of it.

change your own tires

Is it safe to change your own tires alone, with no one around to help?

This is one of the main reasons the trolley exists. A traditional tire change often works better with a second set of hands to help hold the tire steady. On your own, that’s where injuries and dropped tires tend to happen. The trolley is built to be your second set of hands.

Can a complete beginner actually do this?

Yes. It takes longer the first time, but the steps don’t change: loosen, lift, remove, replace, lower, tighten. Our full guide walks through each step in order.

How do I know if I did it right?

A properly changed tire should sit flush against the hub with no gaps, the lug nuts should be torqued to spec in a star pattern, and the car should feel stable and quiet once you’re back on the road.

So, is it safe to change your own tires? With the right tools and a bit of patience, yes, and it gets easier every time. Still have a question we didn’t cover? Check our full FAQ.

"is it safe to change your own tires, driver using a tire trolley"