
Do it once, know it for life. With the right tools, it’s absolutely safe to learn how to change a tire and build the confidence to change your own tires whenever needed. Follow this guide for cars, trailers, and non-commercial vans and trucks with wheels up to 33”.

Before You Start Changing Your Tires
If you have a flat:
- Turn on your hazard lights, slowly reduce your speed and if possible, stop on a level, straight stretch of road with a wide shoulder.
- Safety tip: your spare tire is not designed to drive at highway speeds or for long distances. Be sure to get your flat tire repaired or replaced as soon as possible.
If you’re swapping your tires:
- Choose a safe spot away from traffic, pedestrians, children, or pets, and be sure you have a level place to work so your vehicle doesn’t roll away.
- Ensure all your wheels are pointing straight.
- Safety tip: When the vehicle is jacked, you should never you go under the vehicle. If you have a jack stand, place it under a secure point of the vehicle frame before you remove the wheel.
Step-By-Step Guide

Step 1
Before you jack up the car, loosen the lug nuts [2 minutes]
- Apply the emergency brake. If your wheel has a hubcap use your lug wrench to remove it.
- Using the lug wrench on each lug nut, apply pressure counterclockwise to break the lug nut’s resistance. For this step, the lug nuts may require a lot of pressure, so really throw your weight into it.
- Once the resistance is broken, don’t remove the lug nuts, as they hold your rim to the vehicle. Remember: when it comes to turning lug nuts, lefty loosey, righty tighty!

Step 2
Now that the lug nuts are spinning free, raise the car [3 minutes]
- Using either the car jack that comes with your vehicle, or a floor jack that you can buy from any auto parts store, raise the vehicle until the wheel is about 4-5 inches off the ground.¹
- Safety tip: If you have a jack stand, place it under a secure point of the vehicle frame before you remove the wheel.

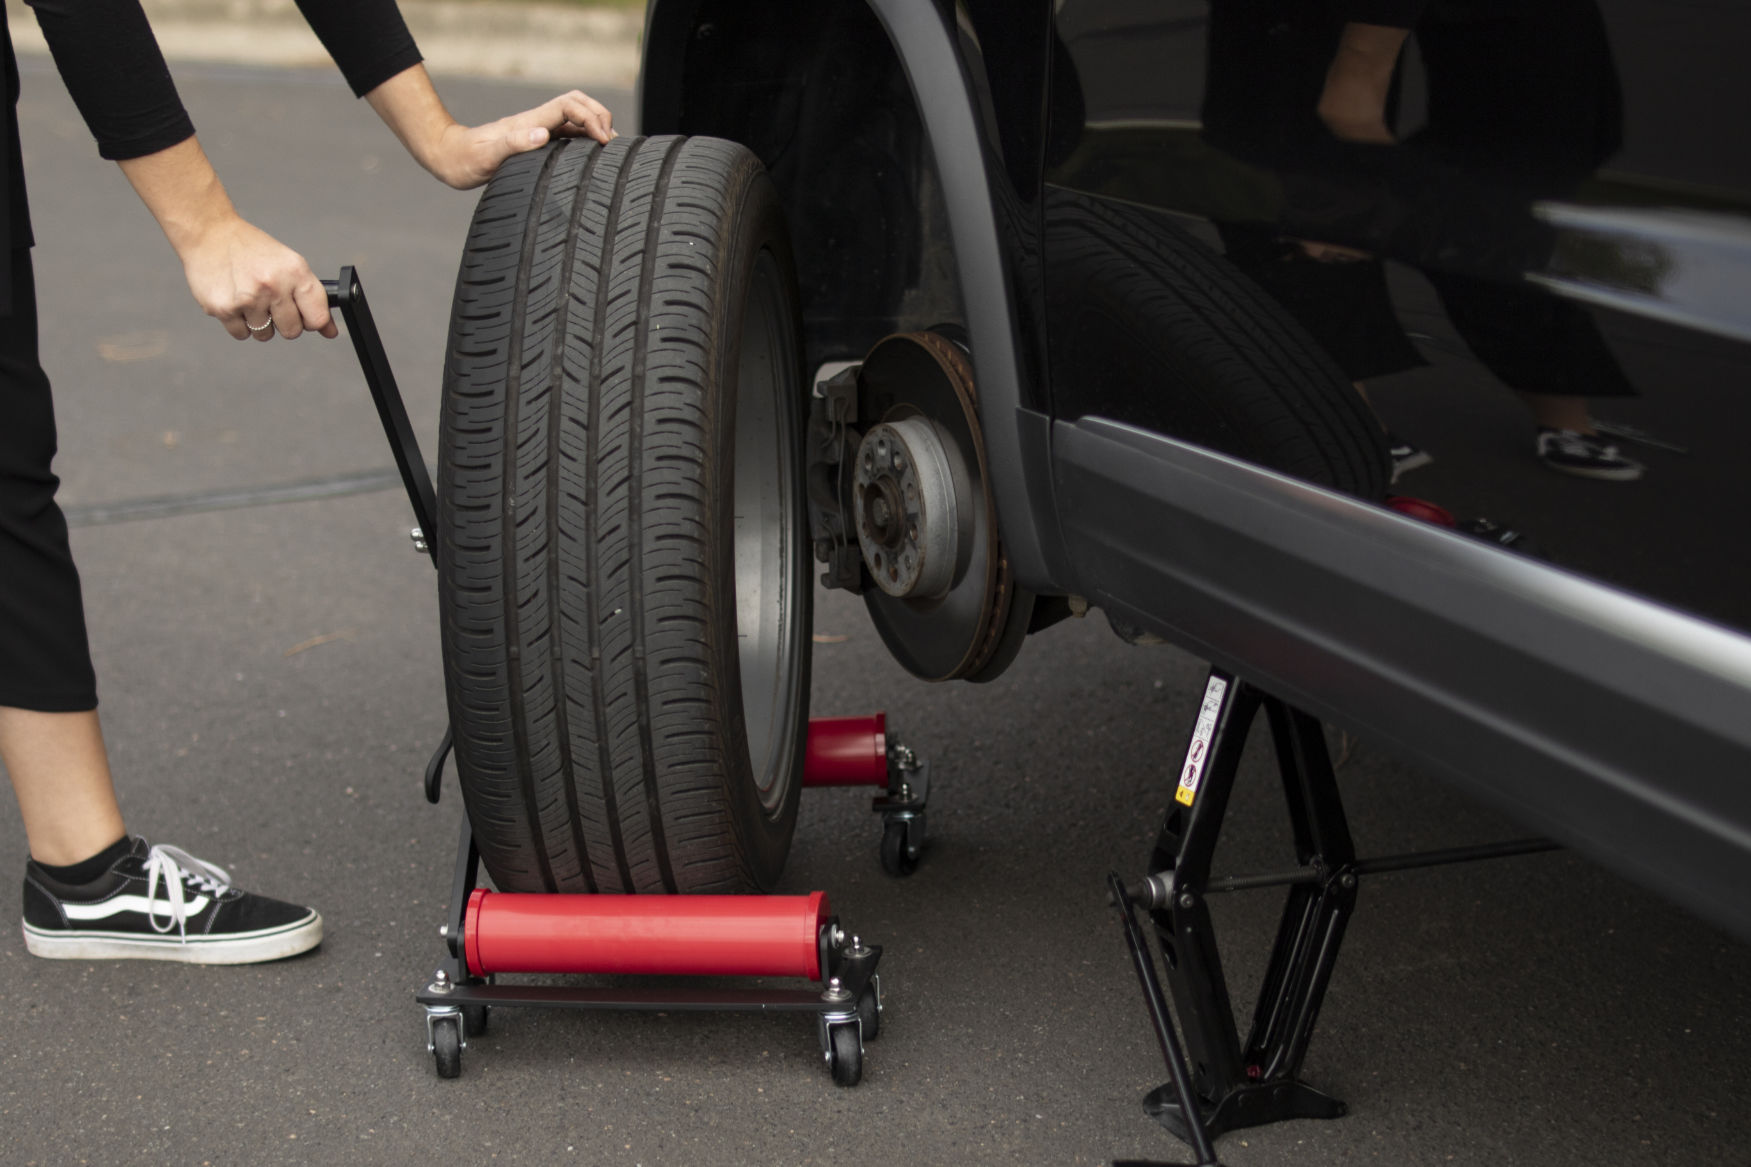
- Roll and position the Jack and Jill of All Tires² below the wheel.
- Pull up on the handle of the Jack and Jill until both roller bases firmly hug the wheel.

- Still pulling up on the handle, place your foot on the roller base of the Jack and Jill to keep it snug around the wheel as you twist the knob and push the cam lever towards the arms to secure the position.
Step 3
Remove the tire [1 minute]
- Remove the loosened lug nuts by hand or with the lug wrench.
- With one hand, steady the wheel. Place the other hand on the handle of the Jack and Jill to pull the wheel off the wheel studs and away from the vehicle.
- Remove the old tire from the Jack and Jill and set it on its side so it doesn’t roll away.

Step 4
Replace the tire [2 minutes]
- If there is a difference in height between the old and new tire, adjust the height of the Jack and Jill to accommodate the replacement wheel.
- Place the new wheel on the Jack and Jill and maneuver it over to the vehicle.

- Once the tire is in position, rotate the wheel on the rollers and align the holes in the rim with the wheel studs.
- Gently push the tire onto the wheel studs until they show through the rim.

- Hand-tighten the lug nuts in place working in a criss-cross, diagonal pattern, as illustrated in the photo.
- Remove the Jack and Jill by opening the cam lever and lowering the arms.

Step 5
Partially lower the car [2 minutes]
- Use the car jack to partially lower the car so the new tire is resting on the ground, but the weight of the vehicle isn’t fully on the tire. The wheel should barely touch the ground, but it shouldn’t be able to spin.

- Working once again in a criss-cross, diagonal pattern, give the lug nuts a first pass, tightening them with the wrench, turning clockwise, until snug. With a second pass, follow the same pattern with a second pass to fully tighten the lug nuts pushing down on the lug wrench with the full weight of your body.

Step 6
Finish up [2 minutes]
- Fully lower the car and remove the car jack. Give your lug nuts a quick check by using your lug wrench to pull on the lug nuts and ensure they’re as tight as possible.
- If the hubcap you took from the old rim will fit your new rim, put it in place the same way you removed it initially. If it doesn’t fit, store it with the old tire.
- Put your tools back in your car. Before you get going, do a quick check of your new tire’s air pressure. If it’s under the recommended amount, drive slowly to the nearest service station to give your tire some air.
- After driving for 40-60 kilometres, you should give all the lug nuts a quick check to ensure they’re still tight after an initial heat cycle.
¹To safely lift and avoid damage to the vehicle, follow the instructions for jack placement in your vehicle owner’s manual. Many vehicle frames have molded plastic on the bottom with a cleared area of exposed metal specifically for the jack.
²These steps can be done without a Jack and Jill tire trolley through careful lifting and positioning to avoid potential injury. Make sure to consult your owner’s manual and review their specific steps on how to change a flat tire for your vehicle.
By following these simple steps, you’ll know exactly how to change a tire with confidence and ease. With the right tools and a little preparation, you can safely change your own tires without the stress or hassle. Changing your tires doesn’t just save you time and money, it also gives you the peace of mind that you’re ready for the road ahead.


